BLOG BUDDIES

March 6, 2014

Guess Whoooo Just Arrived

One of my managers is the proud daddy of twins.... Madeline & Jett, and I wanted to make him something special to keep those memories in.  I decided to make him a gate mini album so that one side could be for Madeline and the other for Jett. I ♥ to make interactive albums (where the pages hide things and do things...) but they do become very chunky so I initially was going to bind this using my Zutter machine but of course the album became too large so I then decided to use (6)  1.5" rings to hold the album together. First off,  can I say that the theme of the nursery is "Owls" so throughout the mini you will see that I use owls for embellishments. The paper I used was DCWV "The Little Miss" & "The Little Mister".  For the cover I took wooden letters purchased at Michaels, painted them lime green. Allowed them to dry then put a nice coat of Elmer's glue on top and while wet applied a layer of white acrylic paint. The glue creates a wonderful cracked effect.
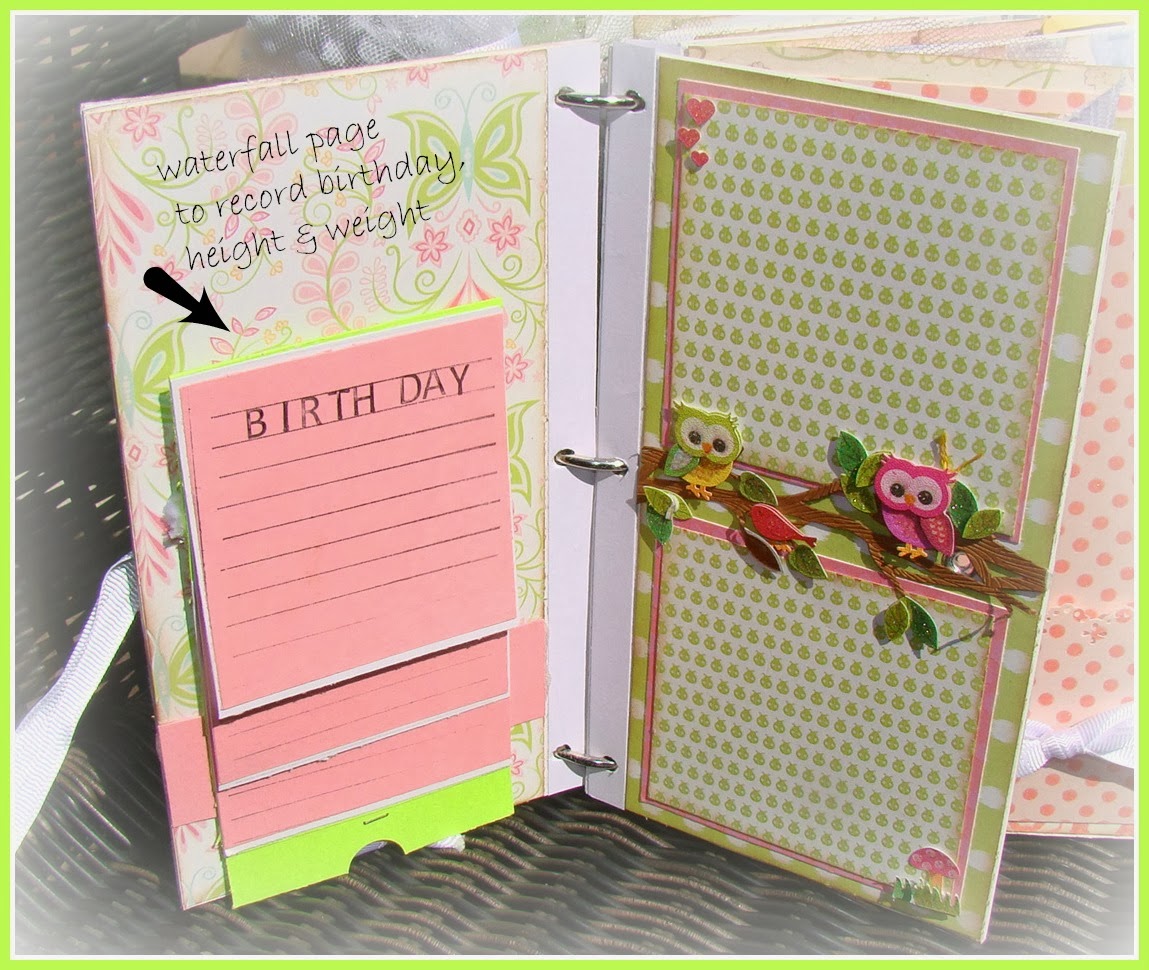
The first page was created using the "waterfall technique" that allow lots of journaling regarding the birth... ex: birthday, color of hair, eye, height, weight etc.
I created pockets throughout the album to accompany tags for additional places for photos and journaling.
The next page was made using a large chipboard heart and covering it, then using double ruffled tulle , I glued this around the edges, finishing off with a simple charm.
The next page was a simple but  an effective layout to allow 2 photos.
The next page was made by creating a pocket under the main photo mat. Tags were created and jump rings attached to each tag to hang from the safety pin.
The next page was inspired by Laura from "Follow the Papertrail" . I had to change the dimensions but the idea of an Owl pocket photo mat was adorable. This was so fun to make.
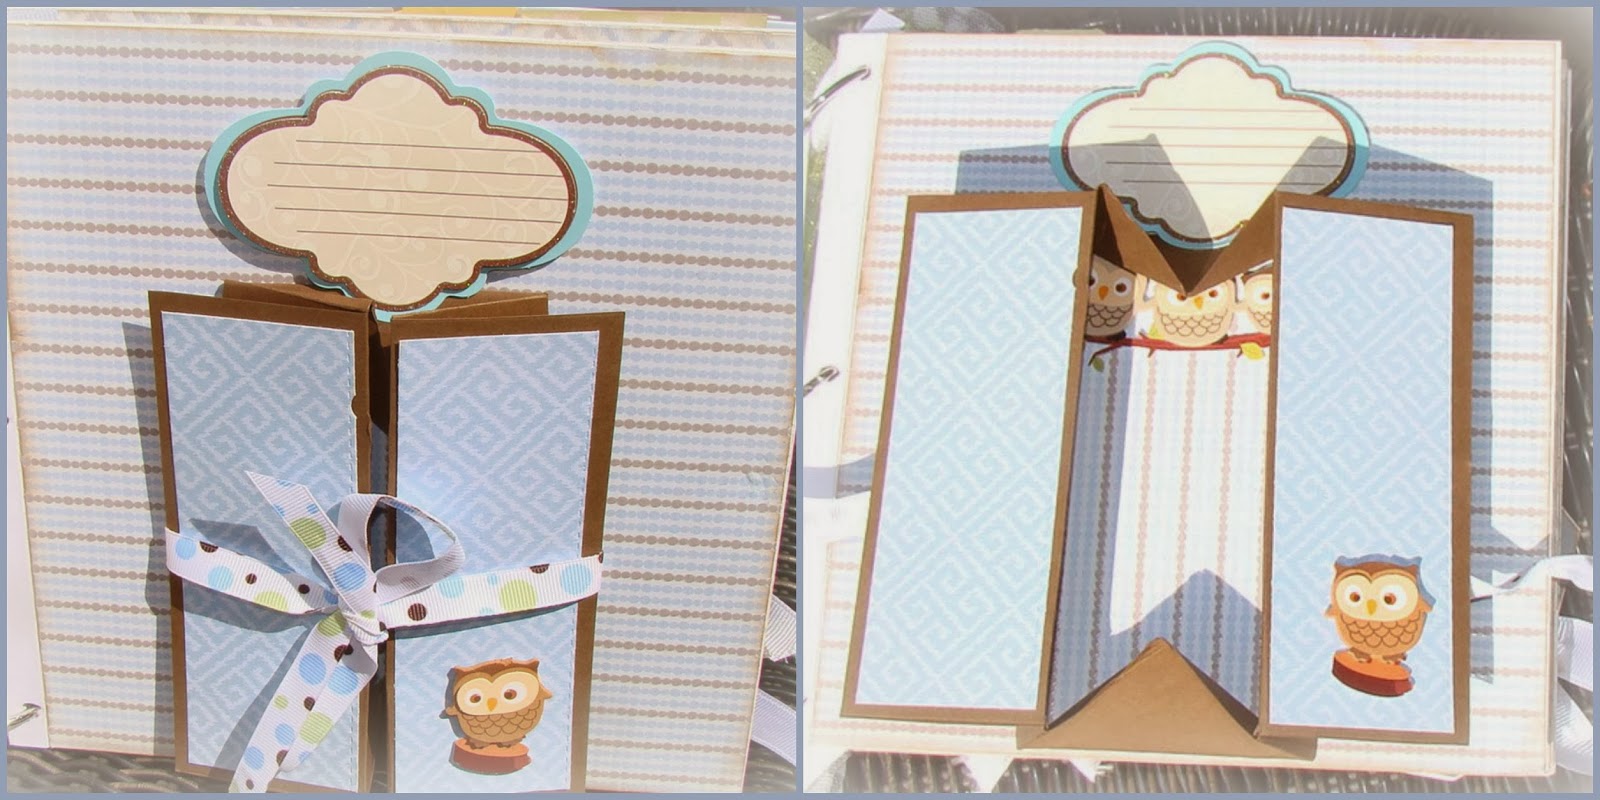
The next page for Madeline a gate fold photo mat which when open creates more space for more photos and journaling. 
And now for Jett's pages.... the first was also a waterfall to provide room for all his statistics, the next 2 pages were simple layout forms that allowed for several photos.
 
A side belly band was created for the next page that gave room for a couple #8 size tags that give plenty of room for photos and journaling.  
Criss Cross pockets were used on the next page for a different visual effect and provided a home for 2 more tags and behind that is of course the main photo mat.
The next page I created leaving the top of the page open which allowed for two large index photo mats to be placed inside. A diagonal pocket was created for holding a tag for journaling.
Since Madeline had an owl page, Jett had to have one also...
The next page was created as an explosion box, I used jute to tie it closed and when open it provides enough room for 5 more pictures. I also used a small paper bag and matted it then added 2 tags for the inside for additional photos and journaling.
The last of Jett's pages was a pop up box which has room on either side for pictures then is tied with ribbon and then when open it pops into a little box for another picture
The very last page of the entire album is one large page so I decided to make this the family page where everyone can be in the photo together.
This was such a fun album to make. Other products I used for this project were, I Am Roses flowers, Prima "Say It With Crystals" Jolee's 3D Stickers, filmstrip, doilies, assorted buttons and metals. To finish off the album I added tulle, and ribbons and I used ribbon for the closure. I hope you enjoyed this and I can't wait to give this album for my gift. xoxo Happy Creating Toni

February 24, 2014

Sweet Sentiment

It's that time again to get together with a couple of my dearest sweet friends and I always love putting together something small for them to show them how much I love their friendship. Originally I was going to decorate some paper mache cupcake boxes that I had, but found they were much to small to put a little something in, so I came across a couple paper mache cones that I had and the lids of the cupcake boxes fit perfectly and looked just like ice cream cones and gave me much more room to put a little surprise in each.
The following are the steps I took to create my "Sweet Sentiments :

I first painted both lids to match the color tulle I would be using. I decided to make one pink for strawberry ice cream and the other brown for chocolate (of course)....
I did not have brown tulle ruffle so I had to stain the tulle. I used Lindy's Stamp Gang Dark Truffle Brown and Sandra Dee Sepia. Be sure to use gloves or tongs, this step gets really messy.
Next step I used a product I sell in my Etsy shop, it is Chocolate Mesh fabric...somewhat like burlap. I used a 9"x9" square piece and applied it to the cone using Fabri-Tac.
Using my glue gun I started from the bottom of the lid and glued the ruffled tulle around the lid all the way till I reached the top. This took 6 ft. And to complete my ice cream cone, I glued a red glittered pom pom on the top for a cherry.
This was just the perfect little project to make to wrap a couple little surprises in for my two buddies.

I took a couple of my tea stained tags from my stash (tutorial post for tea staining) and stamped an image from Oxford Impressions "Fairy Sweet" collection, distressed the edges and stained them and added some tiny white flowers to the corners... and there you have it... my sweet sentiment to my sweet friends.
 
 
The following products can be purchased in my Etsy shop :
 

February 11, 2014

Tag Your It

I love making tag art.. it's quick, allows you to make that mini masterpiece. I have used them for gift tags, placed in my art journals, and have them all over my inspiration wall. They are a wonderful tool to use if you are involved in many of the challenge blogs on the internet, or if you want to try out a new technique it allows just the perfect amount of space to work and then you can write on the back of the tag what steps were taken to acquire your look. My style of art is vintage, worn, distressed so the tea stained tag works perfect for me. I try to keep a big apothecary jar full of these tags all ready for use. Here are my steps that I take to prepare my tags .

Large pan full of water and add about 30 tea bags... ( I know that sounds like a lot, I buy the store brand so it's not too expensive) You can also use instant coffee for this technique. Boil until you get a deep rich tone to your water.

 
Using tongs, separate the tags in the water so the tea is distributed properly. The circular reinforcements will drop off, but there is no need for these

Lay your tags out to dry
 
The next step is optional because you might want  completely flat surface to work on. I love the texture of wrinkles so I make the majority of my tags with the next step. But I do keep some on hand that are completely flat for those projects that call for that look. 
While still damp, roll your tag in a ball and squeeze tightly, unfold and lay back out to continue drying.
 
 
I love the old look the wrinkles give to the tags and applying whitewash or Distressed Inks is so easy to accomplish an old look.
 
Once again, the next step is optional but I love the technique of leaving a cup stain on some of my tags. Your tea or coffee mixture needs to be very dark in order to get a nice tea stain.
 
And the final step that I apply to some of my tags is rolling the edges with a skewer, pencil... etc. to give it that funky old look. Make sure your tags are still damp because when they dry the rolls will be set.
Then you have a whole lot of little canvases ready for your art. I know there are many tutorials on the internet for these techniques but you can never have too much inspiration. The plain manila tags can be purchased at my Etsy shop @ https://www.etsy.com/listing/94773701/manila-tag-number-8?ref=shop_home_active_6&ga_search_query=tag
Happy Crafting..... xoxox Toni


January 27, 2014

XOXO To My Special Friends

 
It's almost Valentines Day and I have been prepping some little gifts for special friends of mine. I have always wanted to make my own bath salts and this is the perfect little something to treat my girlies with. I purchased these heart shaped glass containers for $1.99 at local hobby store. IOn one of the jars I glued  tulle, ribbons & lace. The other jar I copied a cute idea I saw at Michaels. It was simply made by cutting pieces of fabric in strips and tying them on a cord. I had a ton of Christmas red ribbons and felt so this worked perfect for the other jar. I personalized each jar with wooden letters that I painted white then embellished with little gems.
 
Then the fun part... I never new this was soooooo easy. (Thank you Martha Stewart) The recipe is as follows:
  • Coarse Sea Salt
  • Epson Salts
  • Baking Soda
  • Essential Oils
  • Food Coloring
       1.In a large bowl, mix to combine: 6 parts coarse sea salt; 3 parts epsom salts, to soothe tired  
          muscles and reduce inflammation; and 1 part baking soda, to soften waters and alleviate skin
          irritation.
 
      2. Add a few drops of essential oils, and combine.
 
      3. Add a few drops of food coloring, until you achieve the desired shade. If you intend to  
          present the bath salts as gifts be sure to store them in a stoppered container. 
 
I made a batch of lavender and a batch of vanilla jasmine. I can't wait to give them to the girls so they can treat themselves to a nice soothing bath. Happy Sweetheart Day everyone... xoxo Toni

December 16, 2013

Christmas Treats

Hi everyone... the Christmas season is definitely upon us and I work retail and my body is really feeling the residual from all the busyness. The employees at the store have been so exhausted and I thought I would make them a batch of what I call "Snowman Poop".... lol... it's something I usually make this tine of year because it's quick and yummy and sometimes you just need a little snack to keep you going. 
 
Here is the recipe for this fun treat:
 
Popped corn (salted a bit)
Melted white chocolate chips
Drizzle the melted chocolate over the popcorn and mix to coat. Lay out on wax paper to set and then break apart into pieces.
 
I filled treat bags with this yummy treat and included a little poem... now I'm not a poet so cut me some slack...
 
Merry Christmas to you all
And here is the scoop
You've all been naughty
So all you get is Snowman poop
 
 
Very simple to make and fun to give and eat. Hope you enjoyed this post and now I'm off to bed. Have a Merry Christmas !


December 8, 2013

Christmas Greetings

Merry Christmas everyone... today I am sharing with you a Christmas Waterfall card I made for gift cards. I love making waterfall cards, they are so much fun. I did not include a tutorial on this but if you are interested Dawn 5377 YOUTUBE is amazing at all different interactive cards. 
The paper collection I used for this is DCWV "Christmas Made". Wonderfully pretty paper. I added gold Stickles to my Christmas tree on front page as well as used red ribbon for bow and waterfall pull. I added Marvy Uchida Liquid Applique "White" for cuff on Santa's hand. I cut circular tabs on each waterfall page to hold the gift cards.
 
So you better get going on those cards... you only have 17 more days til Christmas... xoxo Toni

December 6, 2013

That's a Wrap

I ♥ ♥ ♥ Christmas... but I have to admit, one of my least favorite things to do is wrap gifts... not sure why, I just don't really enjoy it. But came upon this wonderful youtube tutorial from one of my favorite crafters Arlene...mybutterflykisses12 she created a Christmas card with box. I thought this would be so much fun to wrap a couple of gifts for special people in my life. I actually did not need the box tutorial because my gift came in a box already but I altered the dimensions of the card tutorial to fit my box. This was so much fun. The paper line I used is by DCWV "Cup of Cheer". I added I am Roses poinsettia flowers to the lid as well as some small pine cones from my yard. All papers were sprayed with Lindy's Stamp Gang "Glory of the Seas Gold"

What a fun way to give a gift... stop by Arlene's YOUTUBE channel.. she is amazing  and always has wonderful tutorials. Have fun getting all those gifts ready for the special people in your life. xoxo Toni

November 19, 2013

Frosty & Friends

 
Merry Christmas everyone, here is another project I was working on for my craft boutique I'm involved with.
 
I found these adorable glass light bulb decanters at Hobby Lobby and was actually going to use them for some Steampunk art...... but I saw this really cute post on PINTEREST using real light bulbs and make snowmen out of them and decided these decanters would work perfectly ....
 
I halfway filled the inside with snowballs and iridescent snow flakes. Then I started embellishing the tops. Removed the wires and cut and frayed some Christmas ribbon to tie for a scarf around the base of the top. Added greenery, berries, pinecones (from my yard... ♥ having pine trees close by) . I added some little rusty starts to the top. Then I made the little top hats using stiff black felt, tied jute with a bell around the hat added a bit of Snow Tex to the top of the hat and then it was glued on top of the bulb. Also gathered some twigs from out in the yard, cut to size for the arms and last but not least for the face I used Scribbles 3-D fabric paint. So easy and so much fun to make.... hope you were inspired  .... xoxo Toni


art (ärt) noun - supplement, alter, or counteract the work of nature. The conscious production or arrangement of sounds, colors, forms, movements, or other elements in a manner that affects the sense of beauty.