BLOG BUDDIES

Showing posts with label 12x12 layout. Show all posts

January 18, 2018

2018 Power Word "Serenity" Layout

Happy New Years everyone, hope 2018 is starting off for you wonderful ! I am up on Art Anthology's blog today with a new project inspired by our January mood board. 
I thought long and hard for my power word for 2018 and decided on "Serenity".  I've never been one for resolutions but rather inspired by a power word for the year. After all we can all use a little serenity..right? 
My background was started by enhancing the paper with stencils using paints either sponged on or using a spatula. 
Flowers used are from 49 & Market and they are beautiful but I did need to tint them to the correct hue needed for the layout. So I used my Colorations sprays by Art Anthology to achieve this. Then using prills and seed beads to the stamens and centers of the flowers for interest. 
Sorbet and Velvet paints were also splattered on the flowers just for a bit more texture as well as cheesecloth was dyed with the paint as well for filler. 
Wishing you a "2018" filled with love, joy, and serenity.... be sure to join in on the fun with us with our mood board and post it on Art Anthology's facebook page HERE  to inspire all. 
Entering this in the following creative challenges: 
Frilly and Funky- 2018 The Year Of
Mixed Media Monthly #44- Ring In The New Year (my power word chosen for 2018)
For your enjoyment I have prepared a Snapguide tutorial below. 

August 20, 2017

Moody Blues by Toni

Hi everyone, hope you are having a creatively wonderful month. We have a new mood board over at Art Anthology and it's plump full of pretty inspiration.
Inspired by the different hues of blue, the circles, as well as the motif on the panel and the wood grain on the door. Here is what I came up with. 
I had this photo of my daughter in black and white and I recopied it in ombre effect blues to create this layout. The background was textured using texture paste, paints ran through a stencil. 

Splatters of the paints here and there as well as dipped my lids in the paint for more effect. 
The title were little pieces of wood that I used my crop-a-dial to make a whole, distressed with black soot DI and then spritz with water to provide a grungy effect. Added some brads and adhered to the layout. 
The addition of ribbons, flowers and chunky pieces of wood wrapped with wire added to the interest of the layout. 
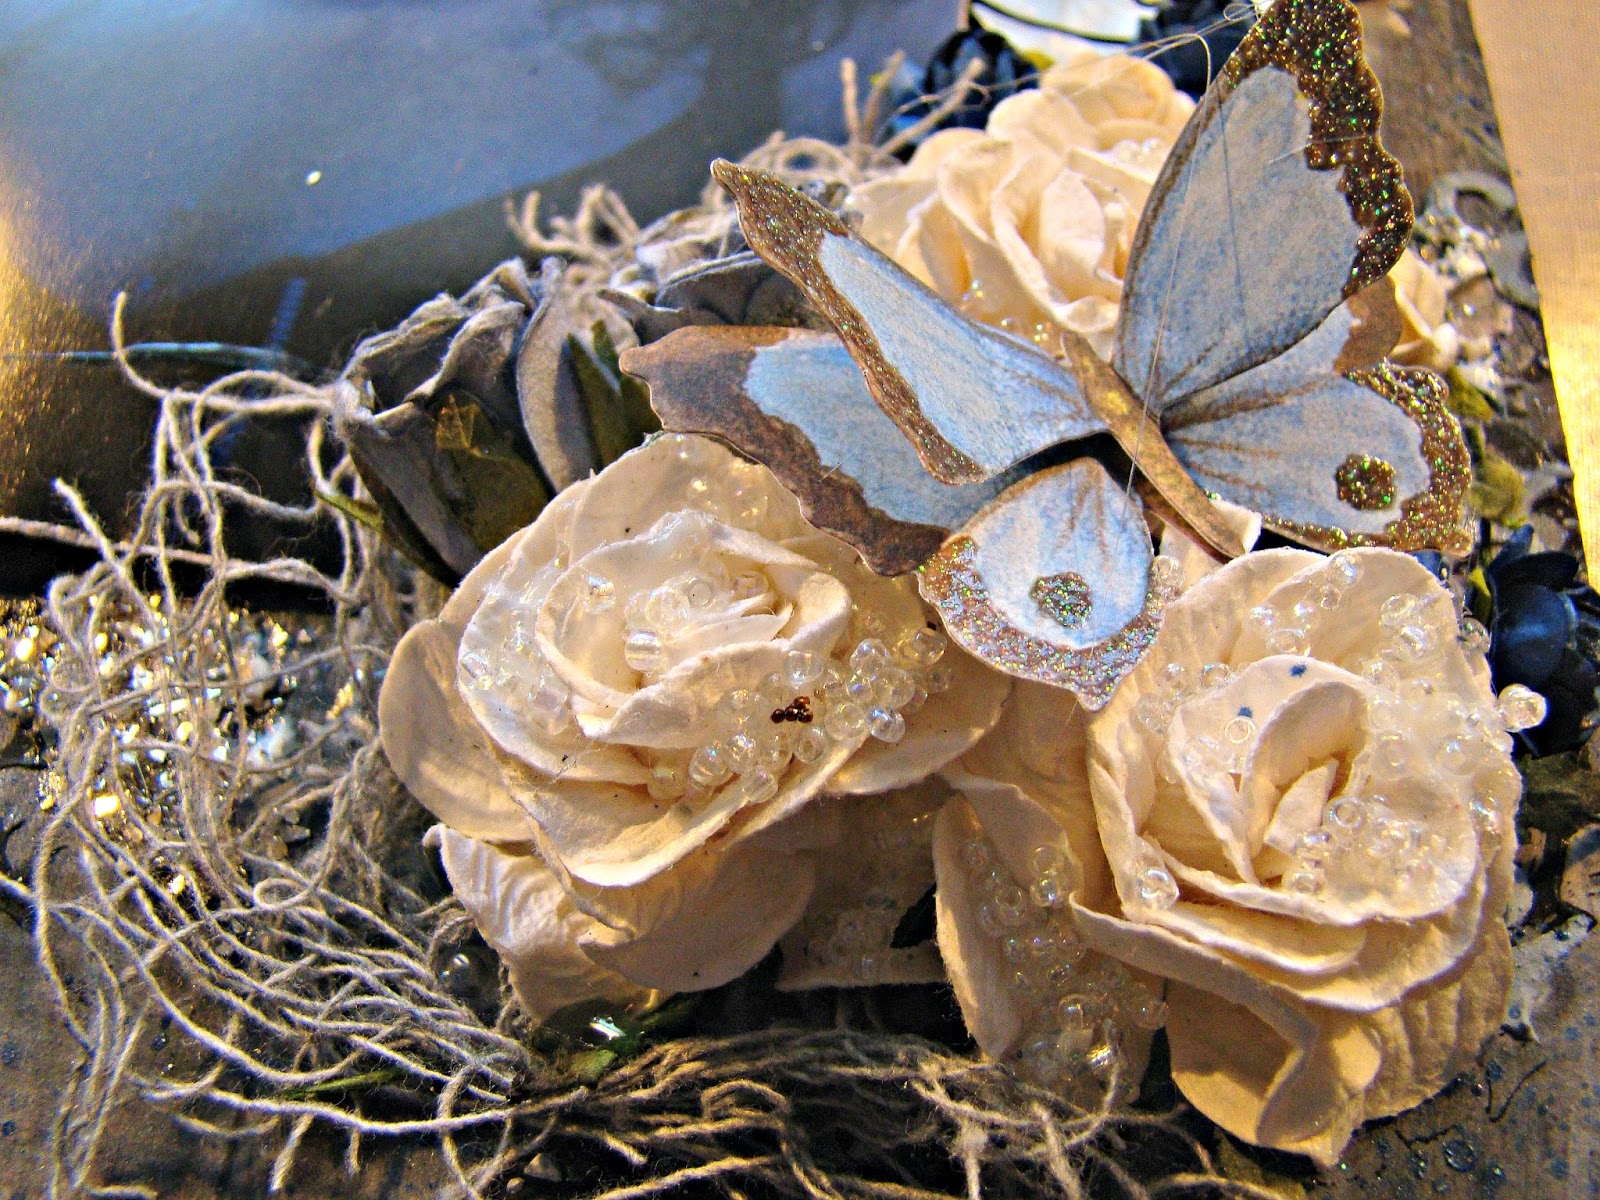
Always believing that "it is in the details" I added crystal seed beads to my flowers as well as Stickles glitter glue to my butterfly. To the layout I also included Sterling German glass glitter to enhance the metallic in the photo. 
The wings I had in my stash, believe I purchased them from Michaels Arts & Crafts awhile back.  Hope you will be inspired by our mood board as I was in so many ways. For your enjoyment I have included a Snapguide tutorial below.  Creatively yours xoxo

April 29, 2017

Mechanical Love

Happy Saturday everyone, today I'm up on the blog with some mechanical love my next design team project for Art Anthology. Inspired by the wonderful mood board this month.
My 12 x 12 layout features my father back in the early 60's on his job as a metal pourer. 

This layout has layers of different textured papers as well as rusty elements with the cogs and light fixtures. 

Chipboard pieces were altered with Art Anthology paints mixed with craft sand, heated with heat gun to a bubbly goodness. 

Addition of washi tape as well as muslin for the matting under the photo creates a more masculine look. 
Grab yourself some of your old photos and create beautiful layouts adding layers and textures. For your pleasure please enjoy my Snapguide tutorial below and also drop by Art Anthology blog for some unbelievable inspiration and techniques for using our products. 
Entering in the following inspirational challenges: 
Sandee & Amelie's Steampunk-Anything Goes, Steampunk / Industrial
Eclectic Ellapu- Vintage or Shabby Chic


July 9, 2016

A Beautiful Day

Hi everyone, it's time to get messy with our Art Anthology paints and art products. It's been extremely hot where I am in Southern California and I needed to work on a project that reminded me of the cool weather, so I chose this photo I took of my daughter in Central Park, New York last winter.
Using AA's gorgeous stencils and applying the Dimensional Velvet paints and adding gold embossing powder really enhances my background paper. Once the stenciled paint was dry I applied Coloration Sprays for shadows and depth. 
I also then embossed my chipboard pieces, portions of the butterflys and matting paper to enhance the layout. 

Layers always add interest to your layouts and you can achieve this simply by adding recycled cardboard to the backs of your photos which provide space underneath to add tags, embellishments, chipboard etc. Distressing the edges of your photos also provides a more vintage worn look. 
Scrapbooking allows you to take a very simple photo and create a wonderful story behind the picture. I hope this has provided some inspiration for your next layout. 
Wishing you a beautiful day and please be sure to drop by Art Anthology's blog with some unbelievable art. Creatively yours, Toni

March 27, 2016

It's A Perfect Moment

Happy Easter everyone... it's time for a new layout I created for Art Anthology. Not too long ago I was at the beach and was able to capture these photos and thought they would make a fun layout. My background was inspired by the colors in the pictures. 
Utilizing AA sorbets and velvet paints allowed me to achieve an organic natural look .  I used Mud texture paste through a stencil for added texture. 
My chipboard pieces were painted with the velvets and also copper Metal Effects for that rusty look. Using the Mudd I also added sea shells on top to bring the entire layout together. 
I hope this has inspired you get out some fun photos and create a beautiful layout. For more inspiration please visit Art Anthology's blog and to view my step x step process enjoy my Snapguide tutorial below. 
Check out How to Use Art Anthology Paints on Your Layout by Art Anthology on Snapguide.

December 7, 2015

Peace On Earth ... for Creative Embellishments

Hi everyone, I'm here to share a December Project using the beautiful chipboard pieces from Creative Embellishments. It is with a heavy heart that I am dedicating this layout to the victims and families of the San Bernardino shootings. My prayers go out to you all.
The photograph was taken at San Clemente beach one morning when I decided to get up early and experience the morning sunrise...what a treat.  
I added Art Extravagance Texture Paste White Sand to the background and while still wet I added sea shells, fishnet, starfish and German glass glitter. 
I traced the top of the wings with hot glue for texture and allowed to dry then brushed with white gesso and added bronze patina embossing to the tops. The globe was also embossed with assorted Lindys powders. 


My title was embossed with black embossing powder, then the entire layout was splashed with black India Ink for interest. I hope you were inspired. Please drop by our blog  HERE for some beautiful inspiration. 
Wishing you peace in your life and a joyous Christmas season. Please enjoy the Harlem Boys Choir with this beautiful rendition of "Let There Be Piece On Earth"

The following Creative Embellishments were used in this project: 


I am entering this piece in the following chalenges:
Love to Create - Anything Goes Mixed Media
Mixed Media Monthly - Silver & Gold

November 19, 2015

The Joy Of Christmas... for Creative Embellishments

Hi everyone...hope you've started on your holiday crafting because before you know it Christmas will be here... Today I'm sharing a 12 x 12 layout of my daughter and our two precious fur babies. This photo was taken a few years ago and it was about time I scrapbooked it. 

I started by layering my new background papers and distressing all the edges, then using my "Sweater Square" stamp by Stampendous I heat embossed it with white powder. I then backed my photo with two photo mats and distressed the edges there also. Now lets get crackin at our chippies. 
First up is the title and "Joy" and I painted this red and then gave it a thick coat of DecoArts Liquid Glass... much like Glossy Accents. The greenery around the photo is "Garland With A Bow" chippie and I added Golden Stucco Paste for texture and then painted it green and swiped over it with Walnut Stain DI for shadowing. For the berries I used my hot glue gun and made dots on my craft mat, then once dry I colored them with alcohol ink in Red Pepper. 
The Flourish Christmas Tree was painted white and then a coat of crystal Stickles was added to the top. The bulbs are different size dew drops that were colored with alcohol inks. The Ideology numbers were painted with black gesso then I used a sanding block to scrap away some of the paint. 

Last but not least... I harvested some pine cones from my yard, I broke away the scales then glued them back together to form flowers. Decorated the tops with Snowtex and sprinkled with Diamond Dust. Well there you have it... hope you enjoyed and were inspired. Be sure to drop by Creative Embellishment to check out their beautiful embellishments ! Warm Wishes for a beautiful Christmas season. xoxo Toni 


November 6, 2015

Thankful

Hi everyone... I am loving this cool weather and excited that it is now fall. This month Creative Embellishments is the proud sponsor at CSI 
We are working on Case # 181 and here is the amazing color palette to inspire you. 
What I chose for my evidence was the following: Kraft background, pencil work in background, frame  & gear / cog which was accomplished with CE Gear Corners, clocks, stamps, string which I used twine at the top of the page. 

My testimony is my handwritten message to my little boy at the bottom of the layout... "Momma's litte angel" 

Here is my take on the case: 
Lots of distressing going on here with my background paper, I stamped the hot air balloons using two different inks... Espresso & Peacock Feathers in order to achieve the colors in the palette. 
Embossing glue was splattered on the background and then Lindy's embossing powder in Desert Turquoise Blue was heat set to achieve a bubbly effect. 

My title says it all.... "THANKFUL"... I truly am thankful to have my little guy in my life... he is like my shadow following me everywhere when I am home. Sometimes getting on my nerves because he often does not want me to craft because he can't sit on my lap while I paint.... lol 

The title was achieved by painting it white first then a coat of DecoArts Crackle Varnish and once dry I applied Raw Umber & Cobalt Turquoise Antiquing Creme to the title. It filled in the cracks beautifully. 
The gear corners and clock were stamped with Andy Skinner Industrial Rust stamps and then DecoArts Quinacridone Gold was applied. Once dry I heat embossed Jukikins Rusty Tin Can for that grungy look and then applied Vintaj's Patina in Verdigris for that beautiful teal. The roses were sprayed with Lindys Tawn Turquoise Moonshadow and Sassy Sapphire Starburst sprays. 

I hope you enjoyed this layout and were inspired to create.. Have a spectacular week... 
Creatively yours, Toni


art (ärt) noun - supplement, alter, or counteract the work of nature. The conscious production or arrangement of sounds, colors, forms, movements, or other elements in a manner that affects the sense of beauty.