BLOG BUDDIES

Showing posts with label mini albums. Show all posts

August 21, 2020

"In The Garden" Reneabouquets Design Team Project

Hi everyone, Toni here with a fun new project featuring our brand NEW Beautiful Board Tree Of Life Loaded Card, Tag or Frame Chipboard Kit.  This is such a fun kit to create. One side has a frame for your pretty photo and the other is a pocket to place more photos, tags, ephemera etc. The paper line I used can be purchased in Reneabouquets store as well and it is Blue Fern Studios Glory of The Garden Collection. 

The frame is to the left of the above photo and on the top of the frame I sprinkled ReneaBouquets Gawdie Girl Diamond Chunky German Glitter Glass  I decorated with some of Renea's gorgeous handmade flowers which are : Itty Bitty Blossoms and Leaves Timeless Blue, , Mini Old Gold Mulberry Paper Roses And Leaves Set , Candy Pink Roses And Leaves, Antique Linen Roses, Gardenia And Leaves 

Here is a photo of the reverse side pocket which I simply made some tags to hold more photos. I embellished the pocket holder with the same flowers as listed above as well as some of Reneabouquets one of a kind butterflies. The ones that I chose are these sweet tiny Magical Miniatures Watercolor Spun Sugar Butterflies . I took a couple of the Beautiful Board Small Pretty Ivy Pattern and painted it a pale green and then adhered Reneabouquets No Hole Fern Green Glass Microbeads to the top of the beautiful board ivy using glossy accents. 
 For this waterfall folio  I created I embellished with the very same flowers as above as well as the butterflies. The gorgeous fairy here is Printed Beautiful Board Small Sweet Garden Butterfly Fairy With Glass Wings .  The beautiful board panel I used on the front is Beautiful Board Cathedral Elements Laser Cut Chipboard and it was also covered with the Gawdie Girl Diamond Chunky German Glitter Glass.  The lace used under the panel is the NEW Reneabouquets Trim-Petite Pearl Lace 
The inside of the folio was kept very simple but I did include an accordion album in the leftside pocket of the folio. On the front of the accordion album I used the NEW Beautiful Board Tree Of Life ATCs or Tag Set Double Layer Design  

I hope you were inspired by this project If you are interested in tutorials for both the Tree of Life Loaded Card as well as the waterfall folio then I have provided you a video below for your pleasure. Wishing you a day filled with peace and joy... xoxo 

March 6, 2014

Guess Whoooo Just Arrived

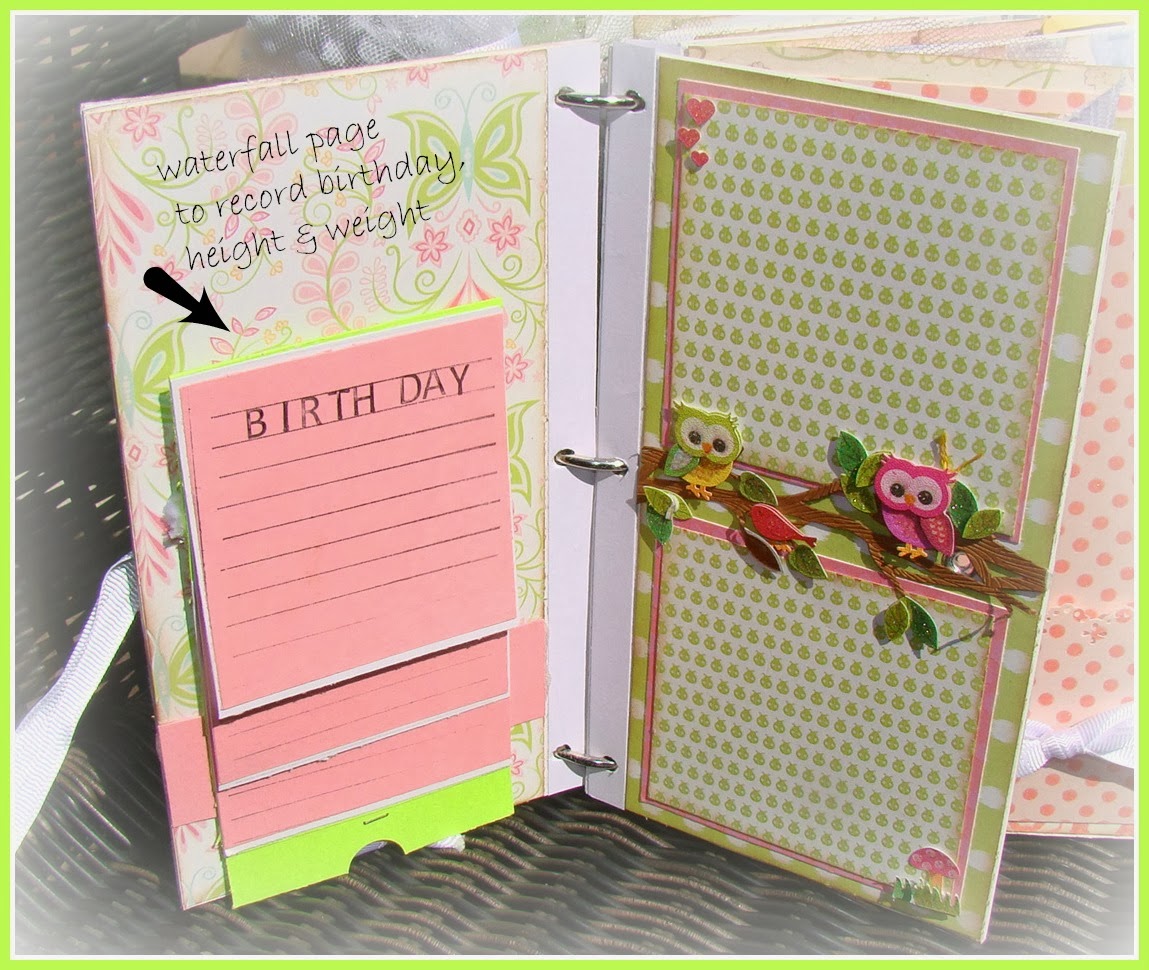
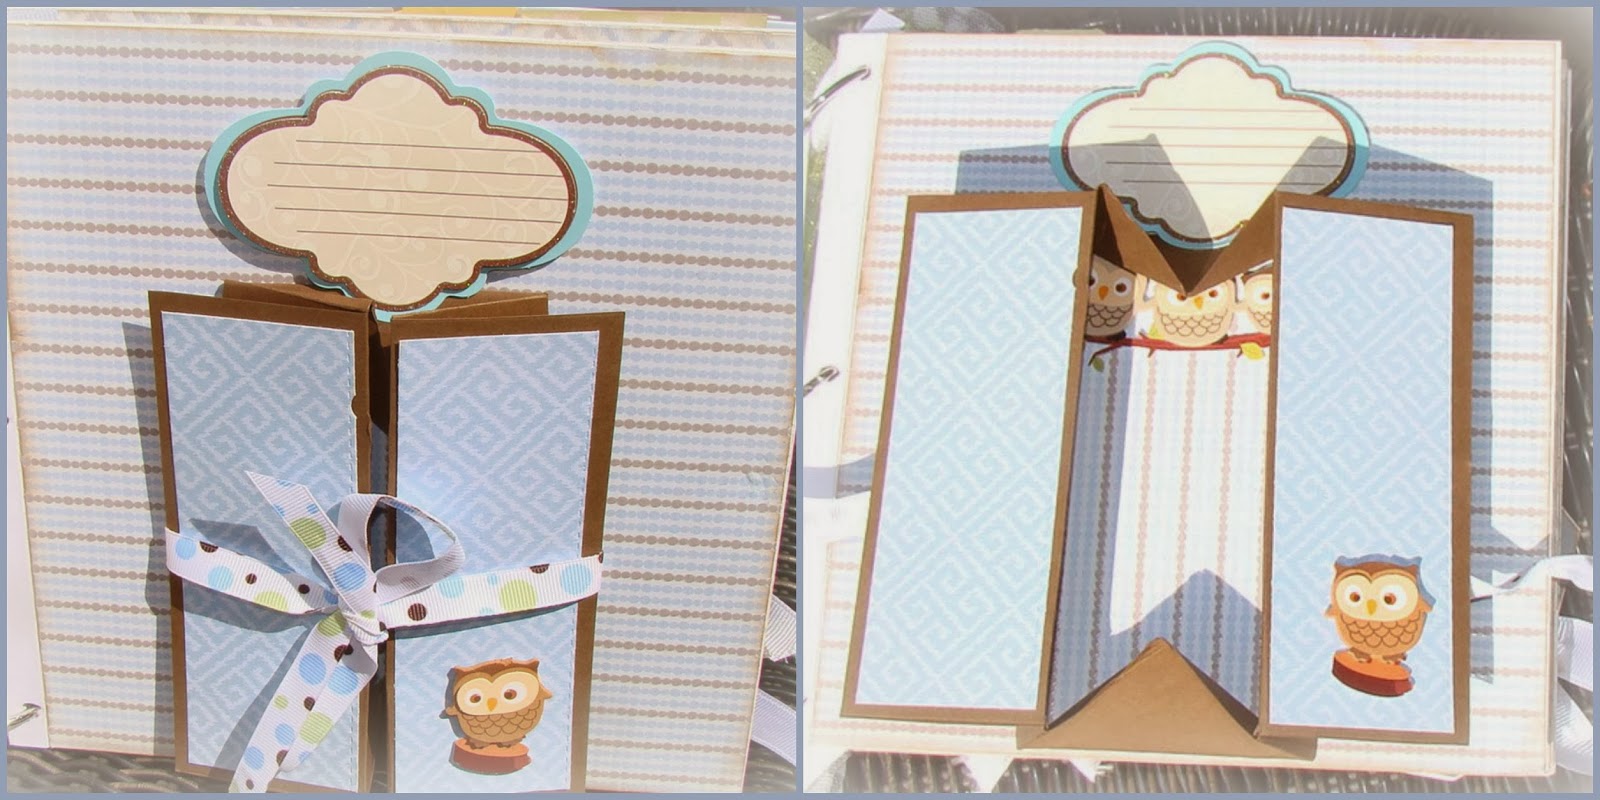
One of my managers is the proud daddy of twins.... Madeline & Jett, and I wanted to make him something special to keep those memories in.  I decided to make him a gate mini album so that one side could be for Madeline and the other for Jett. I ♥ to make interactive albums (where the pages hide things and do things...) but they do become very chunky so I initially was going to bind this using my Zutter machine but of course the album became too large so I then decided to use (6)  1.5" rings to hold the album together. First off,  can I say that the theme of the nursery is "Owls" so throughout the mini you will see that I use owls for embellishments. The paper I used was DCWV "The Little Miss" & "The Little Mister".  For the cover I took wooden letters purchased at Michaels, painted them lime green. Allowed them to dry then put a nice coat of Elmer's glue on top and while wet applied a layer of white acrylic paint. The glue creates a wonderful cracked effect.
The first page was created using the "waterfall technique" that allow lots of journaling regarding the birth... ex: birthday, color of hair, eye, height, weight etc.
I created pockets throughout the album to accompany tags for additional places for photos and journaling.
The next page was made using a large chipboard heart and covering it, then using double ruffled tulle , I glued this around the edges, finishing off with a simple charm.
The next page was a simple but  an effective layout to allow 2 photos.
The next page was made by creating a pocket under the main photo mat. Tags were created and jump rings attached to each tag to hang from the safety pin.
The next page was inspired by Laura from "Follow the Papertrail" . I had to change the dimensions but the idea of an Owl pocket photo mat was adorable. This was so fun to make.
The next page for Madeline a gate fold photo mat which when open creates more space for more photos and journaling. 
And now for Jett's pages.... the first was also a waterfall to provide room for all his statistics, the next 2 pages were simple layout forms that allowed for several photos.
 
A side belly band was created for the next page that gave room for a couple #8 size tags that give plenty of room for photos and journaling.  
Criss Cross pockets were used on the next page for a different visual effect and provided a home for 2 more tags and behind that is of course the main photo mat.
The next page I created leaving the top of the page open which allowed for two large index photo mats to be placed inside. A diagonal pocket was created for holding a tag for journaling.
Since Madeline had an owl page, Jett had to have one also...
The next page was created as an explosion box, I used jute to tie it closed and when open it provides enough room for 5 more pictures. I also used a small paper bag and matted it then added 2 tags for the inside for additional photos and journaling.
The last of Jett's pages was a pop up box which has room on either side for pictures then is tied with ribbon and then when open it pops into a little box for another picture
The very last page of the entire album is one large page so I decided to make this the family page where everyone can be in the photo together.
This was such a fun album to make. Other products I used for this project were, I Am Roses flowers, Prima "Say It With Crystals" Jolee's 3D Stickers, filmstrip, doilies, assorted buttons and metals. To finish off the album I added tulle, and ribbons and I used ribbon for the closure. I hope you enjoyed this and I can't wait to give this album for my gift. xoxo Happy Creating Toni

October 13, 2013

A Magical Celebration

Babies are popping up all around me and here is another mini album I made for a co-worker's new baby -2- b... Hailey Miranda. Here nursery theme is (of course) Disney girls so I decided to create a castle with the the ladies. I purchased the chipboard castle at my local Scrapbook store and the Disney cutouts came in a package that I also purchased at the same store. The papers I used from my stash.  The first page is Mini hosting the album and the photo area is a waterfall book that allows 5 photos and or journaling.
Next is Snow white and the bling I used is Prima "Say it in Crystals" which you can purchase at my Etsy store and Tim Holtz's Chit Chat stickers . Added stickles to Snow White for a bit more bling.
The next page is Ariel. Kept it simple. Added dew drops for water effect and some sea shells and pearls from my collection.
Cinderella was the next page and I decided to do tags for allowing pictures and journaling. Added acrylic butterflies that can be purchased at my Etsy store.
Up next is Mulan... Paper is from Recollections Neopolitan collection. Made a flip page for displaying pictures. Mulan had black feathers and cherry blossom flowers added to her for interest.
For Belle I decided to use Sizzix "Crown" die cut to hold tags. Added crown brads for embellishments and Belle's dress was blinged up with some Stickles.  
Rapunzel was the next page and stickled the stars on the paper, and added crocheted flowers in which I added rhinestones for the centers.
Frog Princess was next and I decorated the castle walls with green stickers squares that can be purchased at my Etsy shop.  Used gold glitter paper for the matting the photo area and Stickles were added to her dress.
Sleeping Beauty was embellished with "I Am Roses" micro mini pink rosebuds and tiny white roses. The frames came with the Disney diecut packages. I used 3-D popup dots on all the die cuts including the frames.
Last but not least is Pocahontas and Jasmine, kept very simple. Made a pop out book which allowed for 8 pictures or journaling. Used jute to tie the book closed attached mini wooden letter tags for Hailey's initials... ( I think it's funny that her initials are H & M ... and that is where mommy works... humm do you mommy did that on purpose???)
And then to finish off the book, I tied random ribbon and tulle and added a beautiful crown charm that I purchased at Michaels . I made little flags, attached to toothpicks and glued them to the top of the castle.
I hope you enjoyed this inspiration. Book was really simple, only took me about 3 days to make.... Toodles  xoxo


July 6, 2013

THIS IS IT / SMASH BOOK


 For those of you that don't know what a smash book is... it is simply as quick and easy way to collect pictures, tickets, memerobilia, receipts and journal whatever is going on in your life at the moment. You can purchase Smash books already made, and you can add your goodies to them, but I thought it would be fun to smash an entire year of my life and June being my birthday month I needed to get started on this book ASAP. I found this chipboard set at Michaels that I knew would work perfectly. Each page could be a month of my year.
I put on my favorite creating music... MJ's....This Is It... dvd and turned up the volume and away I went. First priming the chipboard with gesso and then I added metal embellishments, fiber tape, grunge board, flowers, lace, doilies, etc. 
As you can see... I titled my book "This Is It"... I thought it was fitting for a year of my life
Then I primed the entire surface and all embellishments with gesso. 

Pulled out my Lindys Stamp Gang sprays (these will be sold in my Etsy store soon) and I chose Mojito Green, Cotton Candy Pink and MoonShadow Treasure Island.


Remember when using your sprays to heat set each color before using the next or the colors will run together and you won't get the true color you are wanting.
I love how the cover turned out and I am excited to start smashing my June items on the first page. 
I hope this inspired you to get out there and have a smashing good time creating. In case you need some creative inspiration... sit back and watch MJ 
Photobucket

xoxo Toni

June 1, 2013

Onesie Mini Album/ First 12 Months


I am surrounded by mothers-2-b  with little buns in the oven right now and I love it. For this project I was inspired by the cutest clothes hanger I found and Joann's Crafts for $1. Thought this would be an adorable prop for a mini album that I wanted to make for a co-worker. I drew up a simple pattern for a onesie and cut 7 chipboard pieces out for the individual pages. First page is the cover and the back then allows mommy to record all the delivery statistics. Each page thereafter flips over the clothes hanger and provides space to journal and include pictures of every month for the first year of Baby Cali's  life. Hope you enjoy the slide presentation of the mini album.

There were several products that I used that can be purchased in my Etsy Shop


art (ärt) noun - supplement, alter, or counteract the work of nature. The conscious production or arrangement of sounds, colors, forms, movements, or other elements in a manner that affects the sense of beauty.