BLOG BUDDIES

October 12, 2014

Autumn Magic / Spring Wonder

Wherever you are in the world you are either watching the season turn to spring or fall.  And even though we are still having a heat wave here in California, I can see signs of fall peeking right around the corner. The evenings are a bit cooler, leaves are starting to turn and I can hear and feel a calm breeze blowing. 

This month at Anything But A Card Challenge we are celebrating the changing of the seasons and our prompt is "Autumn Magic / Spring Wonder". My design team project consisted of a picture frame I found on clearance at my local craft store. 
 "Everyone must take time to sit & watch the leaves turn"... Elizabeth Lawrence
I saw this quote and it really spoke to me because sometimes I just get so busy I don't take time for the small things. Before you know it summer is gone we're going into Christmas and you wonder where did the time go. I decided to create a window to watch those leaves change from season to season.  I really had fun getting out my Flower Soft product that I've had for several years and playing with it. 

 I love the texture it provides for your projects and it's so easy to use. I really hope you will stop by Anything But A Card blog for some wonderful inspiration. This theme will run 3 more weeks so you have plenty of time to bust out your goodies and get messy. But remember create anything but a card using the prompt provided and then link back to our blog here so others can be inspired by your creativity.

If you would like to view my process you can check out my tutorial on SNAPGUIDE below. Have a beautiful week !

Check out How to Create Texture Using Flower Soft by Toni Burks-Grijalva on Snapguide.

October 2, 2014

Harvest Bounty

Hi crafty peeps, wow it's already October and it's finally feeling like fall here in California. So glad because I am so tired of the triple digit heat waves we've been having here. With a new month comes and new RAQ (Readers Art Quest) over at Unruly and this month it is "Harvest Bounty"
I love these colors and we have a photograph also for inspiration. I decided to create some little baskets that can be used on your Thanksgiving table for place card sittings. 

The baskets are actually doilies I purchased at Michaels for $1.50 that have been stiffened and molded and then filled with different fall foliage. Most craft stores have their autumn foliage on sale already so these little baskets didn't cost much to make. 

The baskets are fun because you can make each one different and it gives your guest a little something to take home as a keepsake. 

I created a SNAPGUIDE tutorial below if you would like to view the process. I hope this helped with inspiration on this month's RAQ and hope you decide to play along with us at Unruly.  Don't forget to link your photo because the winner chosen will get a fun surprise. xoxo Toni


Check out How to Make Thanksgiving Place Card Bouquet by Toni Burks-Grijalva on Snapguide.

September 28, 2014

Spred Your Wings And Fly

I have some exciting news ... I am now a part of the design team at "Anything But A Card" challenge blog. A group of ladies with unbelievable creative talents and a passion to share and inspire from all over the world. For the whole month of September we've been celebrating "STEAMPUNKtember" and this is my piece.
I decided to use the reverse side of the canvas for a shadow box and created some fun steampunk elements.
I saw this quote on one of my favorite blogs Creative Something... Creative Something is a leading source of insights and thoughts on the science behind creativity and inspiration.

The back of my canvas was a combination of inks, sprays, modeling paste, glitters, paper I can go on and on. Check out my SNAPGUIDE tutorial below for a step by step tutorial on how I achieved this finished project. 
Part of creativity is "spreading those wings". Whether it's trying something new out of the box for yourself, applying for a design team, taking a class whatever, get out of your comfort zone. You will be amazed at where your creativity will lead you. I hope you will join in with ABAC every month as it's so much fun to get messy with your art supplies and have a place to share your inspiration with others. Happy crafting !

I am also entering this piece in the Lindys Stamp Gang September 2014 Color Challenge.  I ♥ this color combo. The butterfly as well as the back of the canvas were sprayed with Tibetan Poppy Teal, Golden Doubloons & Treasure Island Tourquoise. 
Check out How to Use a Canvas for a Shadow Box by Toni Burks-Grijalva on Snapguide.

September 18, 2014

Let's Be Honest

Hi everyone... Seth Apter is hosting a "Studio Table Reveal" hop  "uncensored, unedited, and most likely unkempt."
O.k. let's be honest,  our craft rooms don't always look like those pretty craft rooms you see in the magazines, and quite frankly... MOST of the time mine doesn't look like that. It looks like this and I'm fine with that.
I try to leave a little space to actually work, and when my table is too full, the floor becomes a work space also. The other day I actually got up from my chair and stepped into a palette full of wet gesso...ooops. I guess that's what I get for trying to do so many projects at once. I stopped by many of the studio blogs that are joining in on this reveal and it was liberating !!! 
I love to see messy studios, it's inspiring to me and that's just the way I like to work. I like everything at my fingertips. 

Sometimes I do admit that I get a bit frustrated when I have to climb over things to get to what I want but that is part of my creative process, because many times I come upon something else to use that I wasn't even thinking about using originally. 
And then there is always those bag full of art supplies that haven't even made it out of the bags yet to get stored away for use... hahaha this picture made me laugh 
All in all, I love my messy studio, when I moved here the movers just shook their heads because I had over 60 boxes that were marked "craft room" so they thought they should contact "Hoarders Anonymous" for me. 

Well thank you for stopping by and visiting but you need to leave now because I have projects to work on and more messes to make. Thank you Seth for hosting this fun hop !

September 16, 2014

Back To School


Craft Hoarders Anonymous challenge theme is "Who Loves School and Office Supplies" and who doesn't. My daughter always said that was her favorite part of starting school is to go get all her new paper, pencils, pens, etc.
My project was made for my daughters BFF. She just received her teaching credentials and has her first class of 4th graders this month.
I got this inspiration from Tara Orr's blog (an amazing G45 designer) and immediately knew it would be perfect for Amanda's desk.
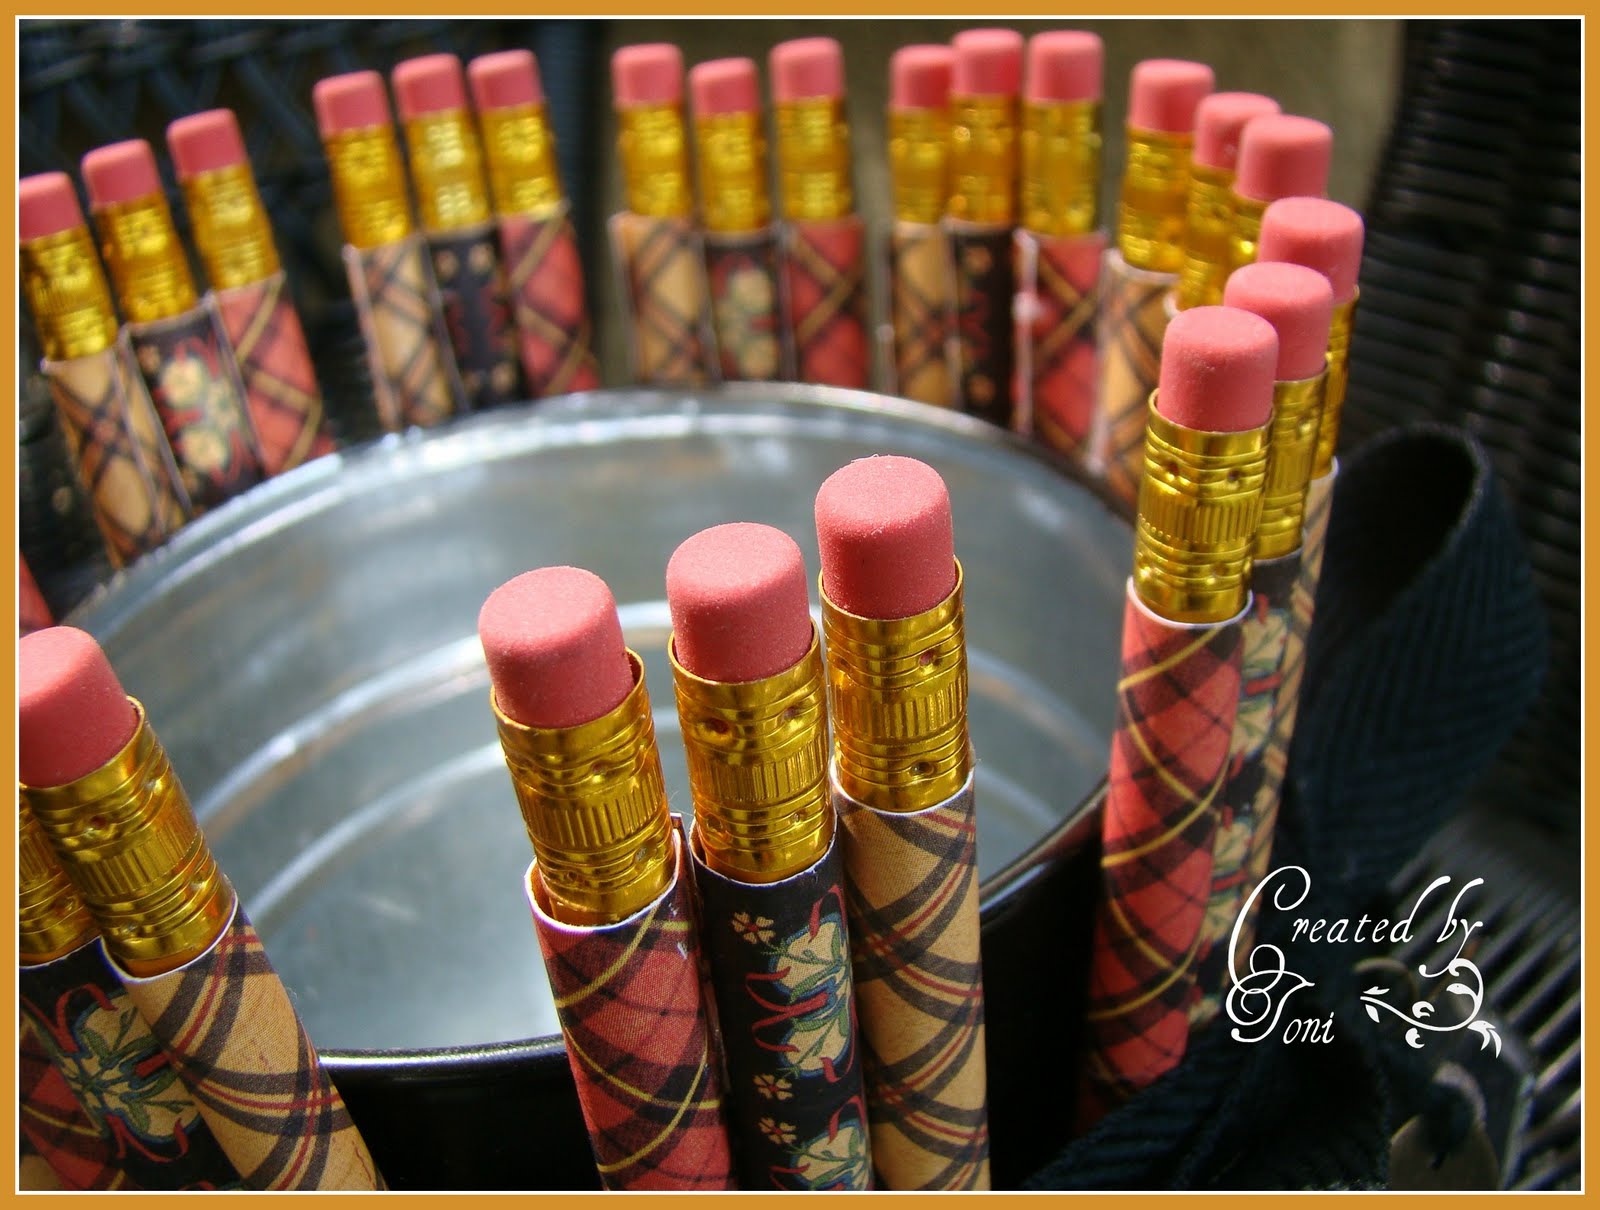
Purchased this tin and pencils at the Dollar Store and painted the tin black.
Used the G45 paper line "ABC Primer" and covered each pencil. The pencils were then glued to the outside of the bucket. Ribbon was tied around the pencils and a tag was made. Distressed the edges and embellished it with brads.
 
A coat of Rock Candy crackle paint was applied for texture and to finish it off I added a Muse Token from Ideaology.
Congratulations Miss Amanda, we know you are going to be a wonderful teacher !

September 15, 2014

Keeping it Organized

Hey everyone... quick post here on my blog on a wooden glue holder stand that I recently purchase from SA Crafters. She has some wonderful items in her Zibbet store and for great prices. I would encourage you to drop by.
Always trying to find ways to make my crafting area more organized I saw this in her shop and for $5.99 I thought it would work perfect. I hate when I'm constantly holding that bottle of glue upside down to be able to use it, or leaning it against something on my table so when I need it I can use it. I'm really happy how it turned out. Very quick altering, maybe took me 3 hours or less, mainly waiting on dry times for different products. Well that's it for my post today. Take a look at my SNAPGUIDE tutorial if you would like to see my process... Happy Monday !
Check out How to Embellish Wooden Glue Holder Stand by Toni Burks-Grijalva on Snapguide.

September 10, 2014

Altered Playing Card Challenge Week 2

O.k. we prepped our 52 cards and now it's time to alter them. This week was focused on Dylusion Sprays.... Love them. Quick and easy art to get you going.

Join in on the fun with Claudine and the rest of us who are involved in this challenge. Claudine is providing some wonderful technique tricks, there are prizes involved and you can also post your pics to the Facebook Group Here 

Cultivate Creativity

Hi everyone... hope y'all are having a wonderful week. Mine has been full of creativity.... projects, gifts, art challenges. I'm loving it. Awhile back I came across this wonderful tutorial  by Lost Wax YOUTUBE  . It provided me inspiration for the background technique I used on this project.
One of the challenge blog's I'm joining in with this week is SanDee & Amelie's Steampunk which their theme is Steampunk Stories. My title on my piece says it all for me. A few years ago I lost my house, marriage and job all within the same year or so. My one and only daughter recently moved to New York and I'm in California. So many changes have taken place in my life. I tend to be a happy go lucky optimistic person, but I definitely have had struggles this last year with all the changes. If it weren't for ART, not sure what I would do. I'm  fortunate that I have a room dedicated to my craft so I can go in there any time of day and play. It releases anxiety, depression, the thoughts of loneliness. Keeping my hands busy is so theraputic. I am very thankful for ART.
I encourage you to do something creative EVERY DAY...whether it's cooking, gardening, sewing, crafting.. it will help release those endorphins into your body to help you relieve stress from the everyday life. Hope you enjoy my canvas.  Have a beautiful week, and keep smiling :-) And stop by some of the challenges below for some wonderful inspiration to get those creative juices going. I am entereing this piece in the following challenges:
You can view my step by step process on this project here.
Check out How to Create Steampunk Background & Faux Metal Flowers by Toni Burks-Grijalva on Snapguide.

September 7, 2014

The Dark of Night - Unruly RAQ

Hi everyone... hope you are having a nice weekend. This month's Readers Art Quest (RAQ) @ Unruly Paper Arts is "The Dark Of Night". I'm in California, USA and it has been 94 degrees at night, so I'm just loving the cool palette of these colors. Blues, Pewters, Grays, Charcoals....  also for inspiration is this photo to get your mojo going.
I had lots of fun creating my mixed media canvas. I busted out my "Goosebumps" product that I have had for ages (completely forgot about it). When sprayed and then dried, it leaves little bumps and texture ... hence goosebumps. The background was painted first with acrylics and then sprayed with Lindys sprays, assorted blue colors for a shimmer. The moon and stars (goosebumps...lol) were highlighted with Distress Paint Pewter.  The stamps I used were from Oxford Impressions. I also used Distressed Embossing Powder in Pumice Stone for the walkway. I love how it gives that sandy, rocky look.
I hope you join in with our team and create something with these beautiful colors. Enter your project and you will have a chance for a mystery bag of goodies and some items from our sponsor this month Eyelet Outlet. Thanks for stopping by and watch out for "Things That Go Bump In The Night"

September 2, 2014

Flower Power

Everything's a bloomin' and I created this mixed media canvas using fun techniques that you can view on my SNAPGUIDE below. I used the Dylusion Sprays and I just love their vibrant colors.
 It seems that everyone is flower happy these days because several challenges this week are flowers, garden etc. I will be entering this piece in the following challenges:
 Try It On Tuesday - How Does Your Garden Grow

Craft Hoarders Anonymous - All The Pretty Flowers
 Frilly & Funky - A Summer Garden 
Anything But A Card - Use Five ... I chose 5 different techniques, stencil, Dylusion Sprays, Glue Gun Technique, Molding Paste, 3D flowers
The Mirror Crack'd - Anything Goes


Check out How to Create a 3D Mixed Media Canvas by Toni Burks-Grijalva on Snapguide.

September 1, 2014

26 Weeks of Fun

Claundine's Art Corner is hosting a "Altered Playing Card Project". Sounds like fun you say.... well check out all the details on her blog. It starts today, but this week is for prepping your playing cards for those mini masterpieces you will be creating. Two cards per week will be altered, tutorials will be given, pinning will take place, and prizes are possible, so let's have 26 weeks of fun together.


I'm Doing A Happy Dance

Whoo Hoo... I have some exciting news. In October my creative journey continues as I have been selected to be a part of an amazingly creative team of people at "Unruly PaperArts".
http://www.unrulypaperarts.com/

 I have been a follower of UPA since it's inception a few years ago and have always been inspired with the new techniques, ideas and the creativity of the columnists, and now I have the opportunity to share my passion and love for scrapbooking, mixed media and altered arts as a columnists for Unruly Paper Arts Blogozine. 

UPA is a wonderful source of information, as with each new month will be a focus of a new theme and throughout the month our columnist will inspire you with tutorials, pictures and inspiration for your art projects.  You can also participate in our monthly Readers Art Quests (RAQ) which is a monthly challenge that provides you with a creative prompt and gives you an opportunity to showcase your projects and a chance to win some crafty goodies.

Now I'm sure your not going to want to miss out on anything going on so jump over to UPA blog HERE to become a follower as well as sign up for the newsletter. And Unruly also has a FACEBOOK page so jump over HERE and "LIKE"  us so you can keep up with the new challenges and sponsor information. It's a great way to connect with fellow scrappers.

Looking forward to creating with all of you.... now let's get this party started . xoxo Toni

August 25, 2014

Welcome To My Laboratory

Hi everyone, it's Messy Monday and for quite some time I have been wanting to put together a journal for just my mixed media. I have several journals sitting around for technique, writing, tags, etc... but none for my mixed media experiments or such.
 I had this canvas album from Prima and thought this would be the perfect place for my mixed media projects, ideas, experiments etc.  It allows me to add pages, it's bulky so will allow those more 3D pages, it comes with canvas pages as well as cute plastic insert pages so I can keep notes, swatches or a completed project.... kind of like my own little mixed media laboratory.
I wanted to decorate the cover and believe me there are layers upon layers on this is why I didn't do a tutorial. What I can say is I used modeling paste, Gesso, Gellatos, Lindys Sprays, Dyllusions, charcoals for the background and colors. Then I added chipboard, metal embellies, letters, buttons, Prima Junkyard Findings, tissue paper, fiberglass mesh tape, stamps and archival ink and topped many of them with Gold Rub N Buff.
Mixed media is so liberating because, yes there are do and don'ts when using different products together for certain results, but if you don't like it, you just gesso it or paint over it and start again. If you don't like the restriction of using just one type of medium, than mixed media is right up your alley. Many popular ways to use mixed media are altered objects and books, collages, 2D & 3D assemblage, scrapbooking, ATC's, greeting cards, book making & journaling.
It also allows you to start seeing objects around your house in a whole different light. You can recycle in your mixed media such as old book pages, tins, paper bags etc. So this will be my little laboratory for my mixed media creations. So go ahead, get messy and "Don't Be Afraid to Experiment"
 
I am entering this in the following Challenge Blogs:

August 9, 2014

A Work In Progress

Well it's been a couple weeks since my last post and I haven't fallen off the face of the earth... yet.

I've been working on several projects and trying to come up with new Christmas inspiration. Yes, Christmas is just right around the corner.  Here is one that is still a work in progress. A paper mache gingerbread house. It will eventually hold a mini album for all my Christmas baking pictures. I will also have a step by step tutorial on SNAPGUIDE for you. Come back and visit when this project is complete.. there are so many fun details on this house.
Happy Crafting ... xoxo Toni

July 21, 2014

Where Bloggers Create

This is my first year getting involved with "Where Bloggers Create" and I have been so inspired by the creative spaces out there with fellow crafters and artisans.
http://www.mydesertcottage.com/2014/07/welcome-to-where-bloggers-create-2014.html
 So welcome to my little piece of heaven on earth. This is where I can go and get lost for hours at a time. I will admit, my crafting supplies are not limited to this space. I also have a hutch in my dining room filled with tools (bind it all, die cutting supplies, adhesives etc. ) as well as half of my linen closet has all my stamps, chipboard, fibers, mini album supplies etc. a cabinet in my garage filled with fabric, more flowers etc.   But welcome to the main hub.
 This room is pretty small, but I have tried to utilize every ounce of space.
Over my window I have these shadow box letters
My next area is my die cutting area &
 T!m Holtz embellishment holders. I do have a Cricut and Pazzles diecutting system but they are currently in another room as I haven't figured out a place for them in here yet.
I
This dresser/hutch was actually white and I painted it black to match all my other furniture.
In the drawers I have my ribbons organized by color and wrapped around cardboard squares. Plastic ice cream tubs are a perfect home for pearls, beads, gems etc. (yea... I ate all that ice cream, well I needed the tubs for containers )
On the shelves are lots of  jars filled with buttons, shells beads etc. and a few pictures and projects for inspiration.
These stackable sit on the top shelf of the dress and are filled with flowers, stickers, ephemera, gems, etc.
I purchased these laundry tubs at a flea market and though they take up space I still use them because they are so cool. I have them filled with large and small random spools of ribbon that haven't made it to the organized ribbon drawer yet & the smallest tub is used for current projects I'm working on such as embellishments, ribbons, etc. I find it easier for me when I get ready to do a project, I peruse my craft room for items I would like to use on the project and fill this tub with those. Then I'm not stopping and looking for items while doing my project. It works for me.
Moving right along, is my corner desk/hutch which has a side table to the left with my printer ontop, Ribbon sorted for my favorite laces, pearls, and diamond ribbon. This hutch is filled with projects I have made or gifts from friends.  The desk has my computer with all the necessities, my steampunk clock is on top as well as more apothecary jars filled with ribbons.  If you haven't noticed... I ♥ apothecary jars.

Next to the desk is a side table with more jars of rhinestones, and bangle beads ... your right... more apothecary jars. I always have some pretty scented candle burning on my candle warmer.
Next up is my craft table... ohhhh you caught it on a good day. Usually you can't see the surface of this table. This is actually a dining room table and as you can see it is pretty packed with stuff...I have my stains, stickles, 2 tool caddies with my scissors, Tonic tools, etc.  my Ranger craft mat completely covers the entire table for easy cleanup. My current project is sitting there waiting to be worked on. it's going to be a gingerbread house with a mini album inside.
Under the table are bins that have all my altered art supplies. These wooden boxes I bought at a junk store and they have extra glue guns, tape guns, heat guns, my tea died tags etc. The bins are separated with all paper mache items, glass bottles, vintage hardware, and one drawer is filled with different size canvases.
Above my desk is my metal shelves with drawers I purchased at Hobby Lobby filled with my mixed media stamps, foam stamps, and favorite stamps, pots hang from the rod to hold  glue sticks, and other random items. The rack to the right of it I purchased at a flea market and it holds all my sprays, tall glue bottles, gesso bottles and paint brushes.
Ok... on to the closet, I have my 12x12 sheets arranged my color, all the solids on the left and pattern on the right. My specialty papers are on the top such as cork, wood,  metal,  & glitter papers.
Under my desk is this crate that I put all my paper pads in, assorted by company... DCWV, Recollections etc.
 
Top shelf in closet has containers of all my photos waiting to be worked on. And all my
Graphic 45 paper pads and projects... Yes they have their own home. I have so much of this paper and there always seems to be a project going on that I am using this paper for.
 
All my chipboard pieces are sepearted by Manufacture...Dusty Attic, Blue Fern, Scrap FX and then by either item # or Alphabetically.
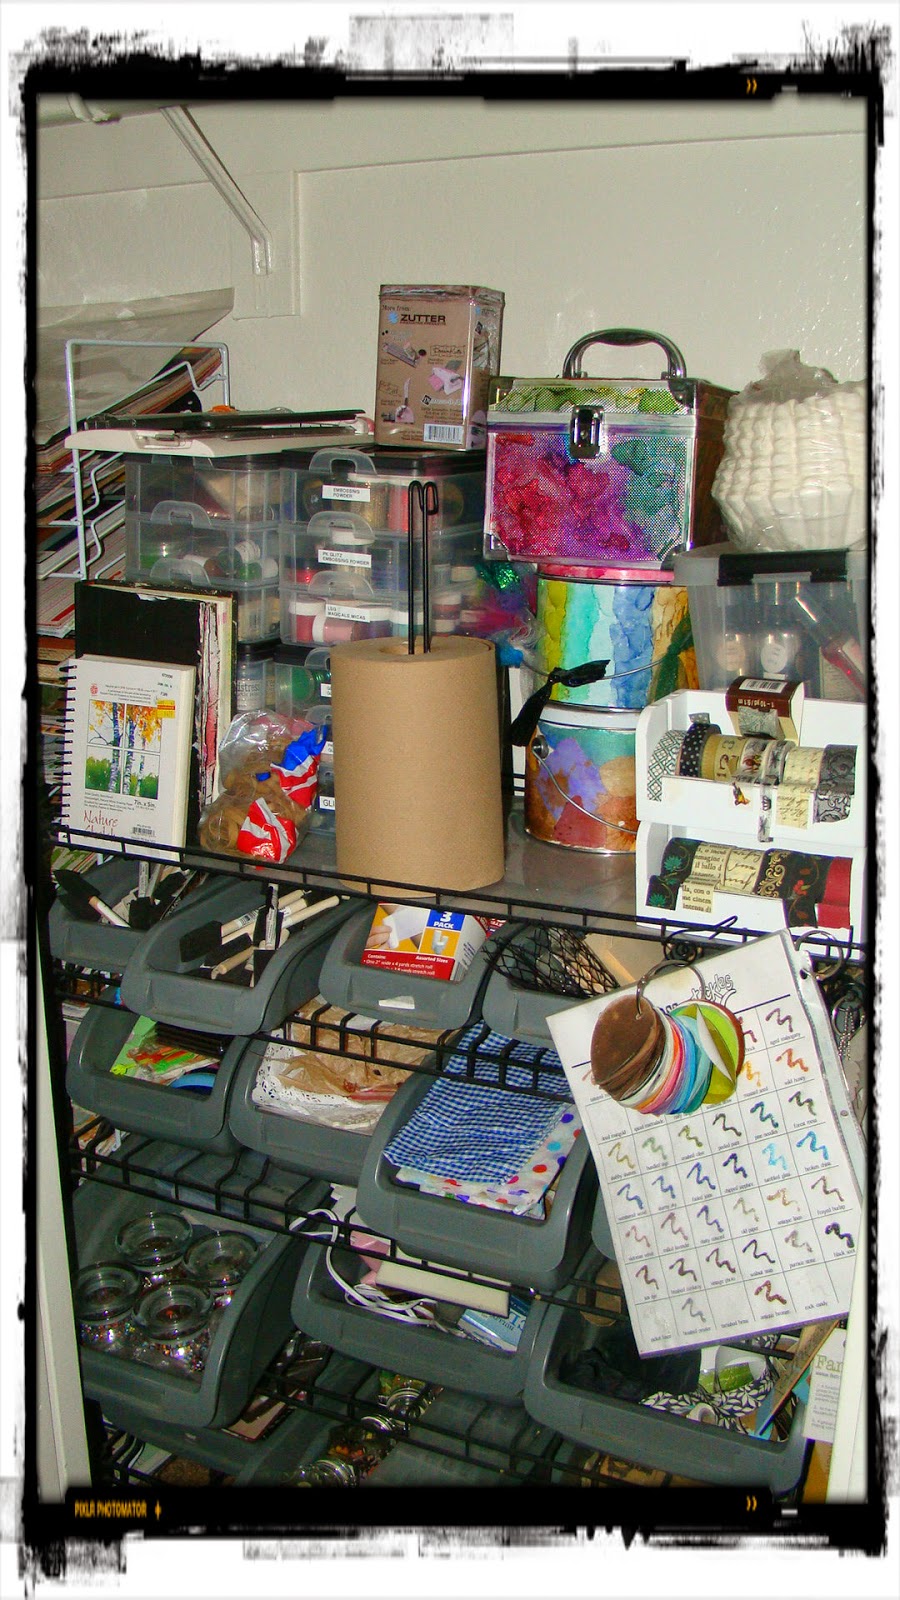
The next item in my closet is probably my most favorite supply caddy in my entire room. I wish you could see this better. I purchased this at Home Depot and it a metal cart on wheels with a top shelf. Has 15 bins for sorting all your supplies. 5 small, 4 medium, 6 large... Absolutely love this. I have everthing you can imagine on this. Top shelf has my tins of alcohol inks, washi tape  holder, my bins of embossing powders, glitters, crackle paints... oh I could go on and on. The bins are sorted by, art wires, jars of embellishment, mixed media supplies, tapes, sponge brushes etc.
Ok... going to the last area, behind the door I have a wrapping station set up with papers, jute, burlap, cellophane paper, and some of my punches. Just those odd things that are hard to store.
On the wall next to that is part of my inspiration wall. It is a metal piece with alligator clips attached to hold your art work.
This is my spraying area... have all my sprays assorted by warms & cools and put in bins, my cardboard box serves as the spraying station. The next bins to the right are all my painting supplies, Melt Art Supplies, UTEE, chalks, Gelatos etc.
Ontop of the bins is an old suitcase that holds all my mixed media supplies, stains, paints, Dyllusions, sponges, bees wax etc.  
Last but not least is my vintage wooden cabinet. I haven't labeled it yet, but it will get done. I have all my I Am Roses flowers assorted by colors, leaves, butterflies, bottle brush trees... all my nature goodies.  
 Hope you enjoyed your visit and stop by Desert Cottage Blog to view other wonderful creative spaces. 

art (ärt) noun - supplement, alter, or counteract the work of nature. The conscious production or arrangement of sounds, colors, forms, movements, or other elements in a manner that affects the sense of beauty.