BLOG BUDDIES

July 21, 2014

Where Bloggers Create

This is my first year getting involved with "Where Bloggers Create" and I have been so inspired by the creative spaces out there with fellow crafters and artisans.
http://www.mydesertcottage.com/2014/07/welcome-to-where-bloggers-create-2014.html
 So welcome to my little piece of heaven on earth. This is where I can go and get lost for hours at a time. I will admit, my crafting supplies are not limited to this space. I also have a hutch in my dining room filled with tools (bind it all, die cutting supplies, adhesives etc. ) as well as half of my linen closet has all my stamps, chipboard, fibers, mini album supplies etc. a cabinet in my garage filled with fabric, more flowers etc.   But welcome to the main hub.
 This room is pretty small, but I have tried to utilize every ounce of space.
Over my window I have these shadow box letters
My next area is my die cutting area &
 T!m Holtz embellishment holders. I do have a Cricut and Pazzles diecutting system but they are currently in another room as I haven't figured out a place for them in here yet.
I
This dresser/hutch was actually white and I painted it black to match all my other furniture.
In the drawers I have my ribbons organized by color and wrapped around cardboard squares. Plastic ice cream tubs are a perfect home for pearls, beads, gems etc. (yea... I ate all that ice cream, well I needed the tubs for containers )
On the shelves are lots of  jars filled with buttons, shells beads etc. and a few pictures and projects for inspiration.
These stackable sit on the top shelf of the dress and are filled with flowers, stickers, ephemera, gems, etc.
I purchased these laundry tubs at a flea market and though they take up space I still use them because they are so cool. I have them filled with large and small random spools of ribbon that haven't made it to the organized ribbon drawer yet & the smallest tub is used for current projects I'm working on such as embellishments, ribbons, etc. I find it easier for me when I get ready to do a project, I peruse my craft room for items I would like to use on the project and fill this tub with those. Then I'm not stopping and looking for items while doing my project. It works for me.
Moving right along, is my corner desk/hutch which has a side table to the left with my printer ontop, Ribbon sorted for my favorite laces, pearls, and diamond ribbon. This hutch is filled with projects I have made or gifts from friends.  The desk has my computer with all the necessities, my steampunk clock is on top as well as more apothecary jars filled with ribbons.  If you haven't noticed... I ♥ apothecary jars.

Next to the desk is a side table with more jars of rhinestones, and bangle beads ... your right... more apothecary jars. I always have some pretty scented candle burning on my candle warmer.
Next up is my craft table... ohhhh you caught it on a good day. Usually you can't see the surface of this table. This is actually a dining room table and as you can see it is pretty packed with stuff...I have my stains, stickles, 2 tool caddies with my scissors, Tonic tools, etc.  my Ranger craft mat completely covers the entire table for easy cleanup. My current project is sitting there waiting to be worked on. it's going to be a gingerbread house with a mini album inside.
Under the table are bins that have all my altered art supplies. These wooden boxes I bought at a junk store and they have extra glue guns, tape guns, heat guns, my tea died tags etc. The bins are separated with all paper mache items, glass bottles, vintage hardware, and one drawer is filled with different size canvases.
Above my desk is my metal shelves with drawers I purchased at Hobby Lobby filled with my mixed media stamps, foam stamps, and favorite stamps, pots hang from the rod to hold  glue sticks, and other random items. The rack to the right of it I purchased at a flea market and it holds all my sprays, tall glue bottles, gesso bottles and paint brushes.
Ok... on to the closet, I have my 12x12 sheets arranged my color, all the solids on the left and pattern on the right. My specialty papers are on the top such as cork, wood,  metal,  & glitter papers.
Under my desk is this crate that I put all my paper pads in, assorted by company... DCWV, Recollections etc.
 
Top shelf in closet has containers of all my photos waiting to be worked on. And all my
Graphic 45 paper pads and projects... Yes they have their own home. I have so much of this paper and there always seems to be a project going on that I am using this paper for.
 
All my chipboard pieces are sepearted by Manufacture...Dusty Attic, Blue Fern, Scrap FX and then by either item # or Alphabetically.
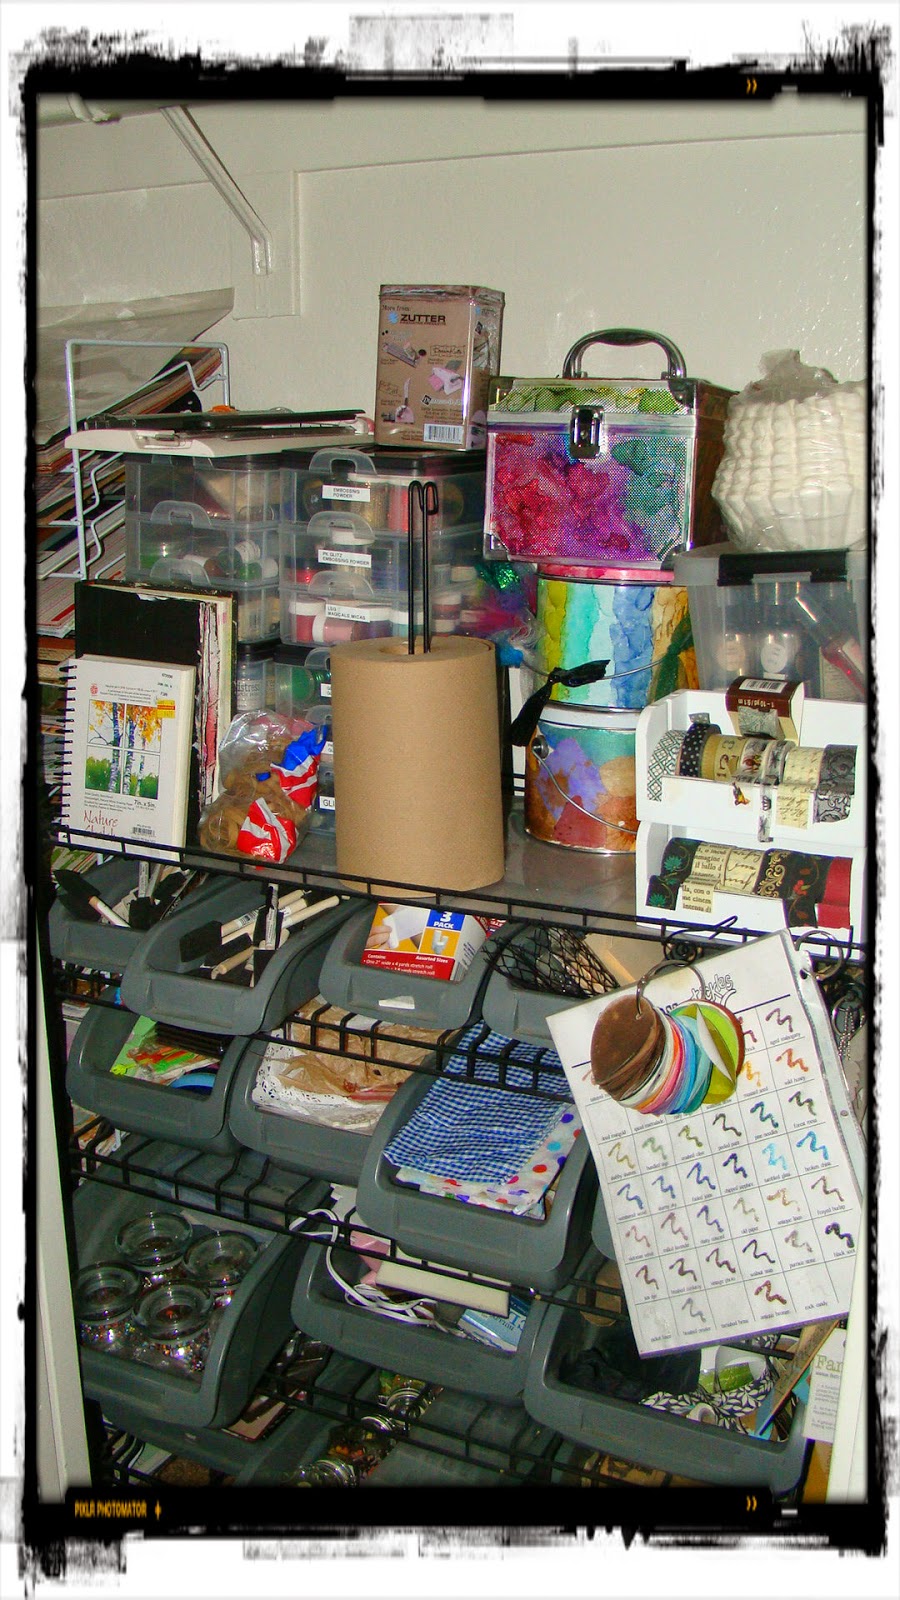
The next item in my closet is probably my most favorite supply caddy in my entire room. I wish you could see this better. I purchased this at Home Depot and it a metal cart on wheels with a top shelf. Has 15 bins for sorting all your supplies. 5 small, 4 medium, 6 large... Absolutely love this. I have everthing you can imagine on this. Top shelf has my tins of alcohol inks, washi tape  holder, my bins of embossing powders, glitters, crackle paints... oh I could go on and on. The bins are sorted by, art wires, jars of embellishment, mixed media supplies, tapes, sponge brushes etc.
Ok... going to the last area, behind the door I have a wrapping station set up with papers, jute, burlap, cellophane paper, and some of my punches. Just those odd things that are hard to store.
On the wall next to that is part of my inspiration wall. It is a metal piece with alligator clips attached to hold your art work.
This is my spraying area... have all my sprays assorted by warms & cools and put in bins, my cardboard box serves as the spraying station. The next bins to the right are all my painting supplies, Melt Art Supplies, UTEE, chalks, Gelatos etc.
Ontop of the bins is an old suitcase that holds all my mixed media supplies, stains, paints, Dyllusions, sponges, bees wax etc.  
Last but not least is my vintage wooden cabinet. I haven't labeled it yet, but it will get done. I have all my I Am Roses flowers assorted by colors, leaves, butterflies, bottle brush trees... all my nature goodies.  
 Hope you enjoyed your visit and stop by Desert Cottage Blog to view other wonderful creative spaces. 


July 15, 2014

This Little Piggy Went to a Birthday Party

I can't believe baby Cali is alreay #1, but it's time to party and I found this cute piggy bank at my local hone décor store for only $5. But of course I needed to make it my own so buttons and bows spruced this piggy up.
 
My card will be entered in the City Crafter Challenge which is "Chipboard".  My piggy bank is entered in Anything But A Card challenge which the current theme is "Anything Goes"
 
I made a ballerina skirt for this little princess and you can purchase the tulle here at my Etsy store.
 
You can view step x step procedure here on SNAPGUIDE, or visit my SNAPGUIDE webpage for more project inspiration.
Check out How to Alter a Piggy Bank by Toni Burks-Grijalva on Snapguide.

Hope you enjoyed this little bit of inspiration. Have a wonderful day !

July 13, 2014

Water My Flowers

Watermark Technique
This week at City Crafter Challenge the theme is "Sunshine & Lavender" the source of inspiration is:
& Craft Hoarders Anonymous is having a theme of "Tag Your It". Anything But A Card challenge theme is "Anything Goes".  Try It On Tuesday challenge is "Colours of Summer". Frilly & Funky challenge is "Summer Heat ... warm colors and include a summer bloom"

I purchased this pretty basket awhile back for a friend of mine and I'm going to plant herbs in it to give her and I needed a gift tag for her present. So these challenges worked out perfectly for me. I used the "Watermark" technique introduced 3 books ago by T!m Holtz in A Compendium of Curiosities Vol I. You can view my Snapguide tutorial below for a step by step process of this tag, or you can visit my Snapguide webpage here  for other fun tutorials. Check out How to Make a Tag Using Watermark Technique by Toni Burks-Grijalva on Snapguide.
Happy crafting, and jump over to those challenge blogs I mentioned for some fun and inspiration. Also, if you are in need of some of the supplies I used on this project or other art supplies, stop by my Etsy store @ https://www.etsy.com/people/StudioGarageBand

June 29, 2014

Happy Birthday America !

It's summertime... swimming, bar-b-ques, watermelon, sunscreen & 4th of July. I have to admit... this one was so much fun, I probably could have kept going and going but I finally had to say "ENOUGH". That's what I love about mixed media... It's an evolving project. I start with one idea and then something takes over, and then I change my mind again and again... I love it... freedom in
art... hey no pun intended to my piece here... lol

City Crafter challenge is Red White and Blue this week. Art Journal Journey challenge is "Houses", and Anything But A Card challenge is "Use 5" ...I used 5 different art techniques, Embossing, 3d embellishing, stamping, glue gun technique & Dylusion sprays. Shopping Our Stash is also "Red White & Blue".
, 3d
The stamps I used for my houses are from the wonderfully creative Teesha Moore.Everyone have a safe and beautiful 4TH OF JULY... Special thank you and God bless to all who have and are serving our country. We salute you ! xoxo Toni
 
 For a step by step tutorial of my process you can check out my SNAPGUIDE tutorial here or for more tutorials and creative inspiration, visit my SNAPGUIDE page here.http://snapguide.com/toni-burks-grijalva/guides/ 

Check out How to Create Mixed Media Journal Page by Toni Burks-Grijalva on Snapguide.

June 26, 2014

Guess What Time It Is?

That's right... it's time to let those industrial creative wheels rollin'... As many of you know I ♥ Steampunk... and the challenge this week at "Sandee's & Amelie's" is creating a steampunk masterpiece using "Shades of Grey, Blue & Rust". And also at Simon Says Stamp the challenge is "I Ought To Use This More".
The two items I Ought to Use More are: canvases (I have a ton and seem to hoard them) and my Oxford Impression stamps, I adore their details
Project titled "When you run out of steam ... make ART" It was my birthday yesterday turning another year older doesn't bother me in the least, in fact I appreciate where I have come from and what I have learned thru the years and treasure what is happening in my life right now at this moment... but yesterday I was feeling really down, and depressed and my body ached and I really just wanted to stay in bed. My daughter (aka... BFF) recently moved to NYC and though I am super happy for her, I am missing her more than I ever imagined. Some days I quite frankly have no energy to do anything and I know it has a lot to do with her being gone.
Don't let me kid you .... we talk once maybe twice a day... yea I know what your thinking... get a grip lady ! When she told me she wanted to transfer her job from California to NY I quite frankly was so excited for her. I have always encouraged her to follow her heart, experience life and my door is always open for her to come home to. We've both agreed that if NY becomes her new home, I will in deed move there because I need to be with her and my future son-n-law (no one in mind as of yet) and my future grandchildren.
Some days are good, some days aren't so good... today actually was better... so see I know it's just a matter of missing my girl. Alright, enough of that... back to my project. Art can really revive me... I put on my music or favorite movie and next thing I know its several hours later.

For more wonderful inspiration, and if you ♥ Steampunk, be sure to drop by Sandee's & Amelie's challenge blog and have some fun.  And if you want to challenge yourself to something new every week... check out Simon Says Stamp... they never disappoint.
 
For a detailed tutorial on how I accomplished this canvas, check out my SNAPGUIDE tutorial below or visit my SNAPGUIDE website for more inspiring projects. http://snapguide.com/toni-burks-grijalva/guides/
Check out How to Create Mixed Media Steampunk Canvas by Toni Burks-Grijalva on Snapguide.

June 15, 2014

A Special Gift for A Special Someone

This month is my mom's birthday and I wanted to make her keepsake of family photos. I decided to use Maya Road's Clutch Purse mini album. This clutch provides a lot of room for many photos. I made the photos into wallet size and was able to fit 34 photos in it.

This is the inside which also was decorated with pearls & metal embellishments.
"I Am Roses" always work perfectly when spraying for your own custom colors.
I hope my mom will enjoy this mini album which is packed full of her family's memories. Happy birthday mommy... I ♥ you
 Below is a step by step tutorial on developing this mini album. For more projects check out my SNAPGUIDE website : http://snapguide.com/toni-burks-grijalva/guides/

Check out How to Make Purse Mini Album With Faux Leather Technique by Toni Burks-Grijalva on Snapguide.

June 9, 2014

It's Art Journal Time

Calgon take me away... or better yet... Art journal take me away ! When I'm stressed, depressed, overwhelmed or I need something to jumpstart my creative days, my art journal always seems to come to the rescue. Sometimes I can spend hours on a page, yet other times I only mess around for 30 minutes or so. 
 
As a crafter sometimes its hard to get rid of the silliest things, and old inked, painted paper towels seems to be one of those for me. I tend to have a pile sitting around to use on my collages, journals or layouts. That's what formed the base for this journal page. I first added a layer of white gesso and then applied my recycled paper towels to the pages. Added some doilies for texture. Using Golden's modeling paste, I created more texture with my circle stencil. Next applied some more color with my Gelatos. Last but not least, randomly stamped some images with black STAZON. Using metal plumbers tape, I cut out the letters "ART" and then finished off with the quote on my tag.
 
It was just enough creative warm up to get me in the mood for a day of scrapbooking. I find, sometimes you hit a creative block and you just need to work on something that has absolutely no boundaries and that is what my art journal does for me. Happy creatimg. TFL xoxo Toni

May 10, 2014

Happy Mothers Day

It's time to celebrate that special person in your life that you call Mom and what woman doesn't love flowers. I decided to create a vase that can hold your pretties. Very simple but effective...
Doesn't take many ingredients for this project:
 
Mason Jar... or jar of your choice
Burlap Ruffle Ribbon
Linen cloth ripped in 3/4" x 24" strip
Burlap material 2" x 24" in length for flower

(You can also embellish with lace, ribbon, pearls, etc. )
Frogs Lid insert for mason jar (purchased from craft store located by the mason jars)
River rock or pebbles of your choice (purchased from craft store)
Glue gun & glue
Glue your burlap ribbon around the center of the mason jar. Then take your strip of linen material and adhere that to the middle of the burlap ruffle. This is where you can add your own special touches of pearls, lace, gems... etc.
Next I made a burlap rosette following the YOUTUBE tutorial from https://www.youtube.com/watch?v=W4aVbtdKwyw... I didn't provide step by step because it was too difficult to photograph while my hands were holding onto the material. I then cut a piece of linen in the shape of a leaf, pulled out strings from the material to give it a fringed look, and glued a sweet little butterfly on the flower.
Next I added river rock to jar to help secure your flowers in the jar... this is really not necessary but I love the organic look of the rocks inside the jar.
Next add your Frog Insert to your mason jar lid. These are really nice for holding your flower bouquets in place.
And the last step is to add your pretty flowers. Lastly, I had some wooden tags that I simply painted with chalkboard paint, let dry, ran some jute through it to hang on gift and using a chalkboard pen I wrote my sentiment.
That's it... a pretty little something for that wonderful lady in your life called "Mother"... Everyone have a spectacular day, I know I will... I don't have to work so I get to spend time with my Mom and so looking forward to it. xoxo Toni
 
Below are some of the items I used to create this project as well a couple of suggestions that would be perfect to use on this project, and all can be purchased from my Etsy shop @ https://www.etsy.com/people/StudioGarageBand
art (ärt) noun - supplement, alter, or counteract the work of nature. The conscious production or arrangement of sounds, colors, forms, movements, or other elements in a manner that affects the sense of beauty.